Loading...
Searching...
No Matches
Quickstart
New nodes can now be created with either mkmpnode or mpn:
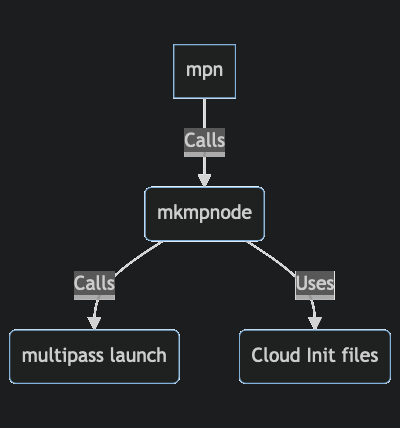
mkmpnode- (Make Multipass Node). A generic utility to create a single node with arbitrary specifications and specified (or default) cloud-init files. Runmkmpnode -hfor an explanation and options.
mpn- (Multipass Named Nodes). A utility to create one or more nodes at the same time based on naming convention of nodes. The Node naming convention controls both the size of the node and the cloud-init specification used.
The relation between the scripts are shown in Figure 1.

Figure 1: Relation between scripts and the underlying multipass
Accessing the node
When the nodes are setup (using Cloud Init Files) the current users public SSH key are installed in the node so that it can be easily accessed by ´ssh´ directly without any password hassle.
Examples
The following basic examples show how nodes can be created once the mptools package have been installed. This is just a quick review without explaining all details, the details are explained in the rest of the user guide. The purpose of these examples are just to give the reader enough to determine if this package is a good fit for purpose.
Creating nodes using naming convention
mpn ub24fl01- Create a node based on Ubuntu 24 LTS with a full development configuration (f) in a large (l) size node.mpn ub24bs01- Create a node based on Ubuntu 24 LTS with a basic (b) node configuration (no development environment) in a small (s) node.mpn ub20ms01 ub20ms02- Create two nodes, both based on Ubuntu 20 LTS, minimum development configuration (m) in a small (s) node.
Creating nodes using the full configuration
mkmpnode -m 1GB mynode- Create a node with 1GB RAM, use the default cloud-config file and name it mynode.mkmpnode -m 2GB -d 10GB -c pg-config.yaml db-server- Create a node named db-server with Posgresql database cloud-init config with 2GB RAM and 10GB disk.
- Note
- In the rest of this documentation it is assumed that the package have been installed and that links to the scripts have been created in
/usr/local/binand that this path is included in the$PATHshell variable.